FRP Urban Furniture Project Planning for Public Spaces
Plan durable FRP urban furniture with practical guidance on site use, weather, anchors, accessibility, finishes, maintenance, and approvals.
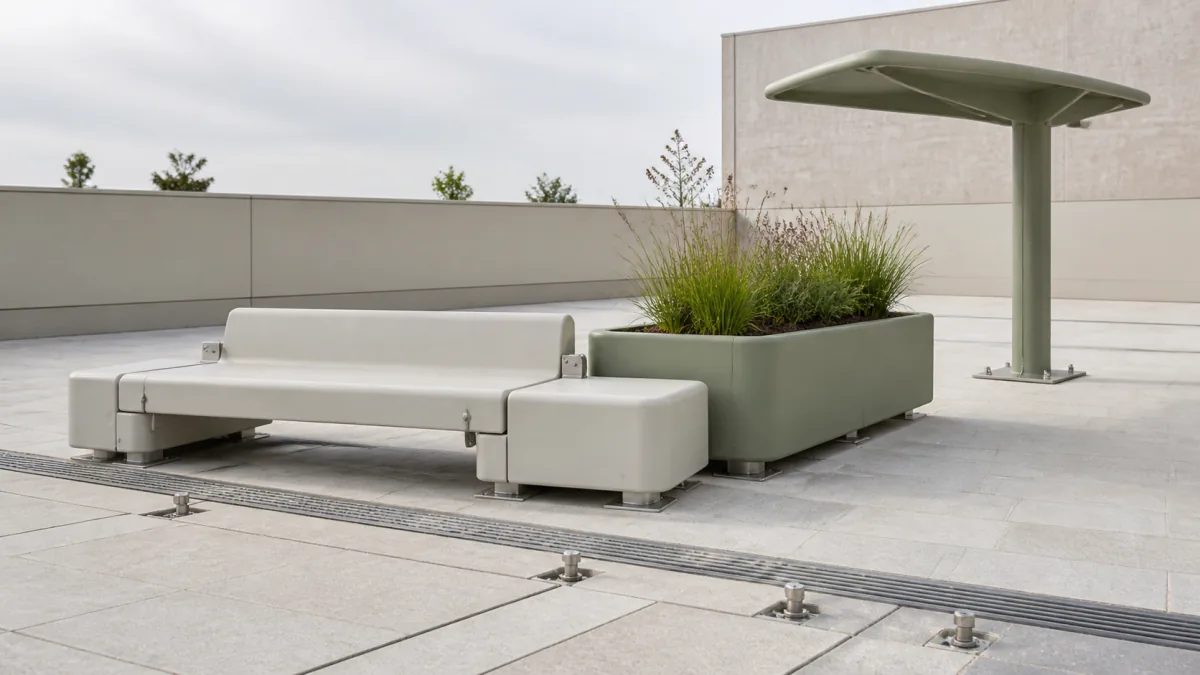
FRP urban furniture project planning starts with the site—not the product shape. A bench, planter, bollard cover, seat wall, table, or shelter component must fit how people use the area, how the base is built, how water moves, and who will maintain it after installation.
Fiberglass-reinforced plastic can support highly customized public-space furniture, including curved forms, integrated color, and corrosion-resistant composite construction. However, long-term results depend on the specified laminate, finish, structure, anchors, installation details, and maintenance plan. Define these decisions before requesting quotes or approving tooling.
For a broader view of applicable forms and applications, see these FRP urban landscape structure options.
Define Users, Location, and Expected Abuse
Begin with a written use-case statement for every furniture type. “Outdoor bench” is not enough. The same form can face very different loading, misuse, cleaning, and replacement requirements in a private courtyard, transit setting, school campus, waterfront promenade, or public park.
Document the following project inputs:
- Primary users: Children, older adults, commuters, visitors, maintenance crews, customers, or mixed public traffic.
- Expected occupancy: How many people may sit, lean, stand, or place belongings on the item at once?
- Use pattern: Continuous daily use, seasonal use, event-only deployment, or controlled-access use.
- Likely abuse: Skateboard contact, climbing, impacts from carts, vandalism, dragged equipment, or unauthorized vehicle contact.
- Site exposure: Open plaza, protected courtyard, rooftop, pool area, shoreline, trail, streetscape, or indoor-outdoor transition.
- Security needs: Is the item intended to be permanent, movable by staff, or capable of being temporarily removed?
- Cleaning methods: Manual washdown, pressure washing, disinfectant use, leaf-blower exposure, or power equipment nearby.
This information affects more than material thickness. It can change the internal support arrangement, base geometry, edge detail, mounting strategy, surface finish, and repair approach.
For example, a low-profile bench in a pedestrian plaza may need a stable, tamper-resistant installation and a finish that tolerates repeated cleaning. A freestanding modular seat in a managed courtyard may prioritize relocation flexibility and protection of the finished paving. A planter may require a separate structural liner or frame if the design must carry soil, moisture, and vegetation loads.
Avoid treating all FRP products as interchangeable. Resin type, reinforcement schedule, core material where used, embedded components, finish system, and support conditions should be selected for the actual application.
Review Weather, UV, Moisture, and Drainage
Outdoor composite furniture should be designed as a complete weather-exposure system. FRP can be suitable for exterior applications, but its performance depends on the material specification and on details that prevent standing water, uncontrolled moisture entry, and premature finish degradation.
Review the local exposure conditions during design:
- Direct sun and reflected heat from paving, glass, or metal facades
- Freeze-thaw cycles and snow storage
- Rain direction, wind-driven water, and flooding potential
- High humidity, coastal salt exposure, or pool chemicals
- Irrigation overspray
- Temperature swings between day and night
- Debris accumulation in seams, cavities, and drainage paths
Specify UV Protection as a Finish Decision
A colored composite surface may be created with pigmented gel coat, a painted system, or another agreed finish approach. Each option has different repair, color-matching, cleaning, and weathering considerations.
For public-space projects, confirm:
- The target color reference and acceptable variation.
- Whether color is integral to the molded surface, applied after molding, or both.
- The desired gloss level; very high gloss can show scratches and smudges more readily.
- UV exposure expectations for the actual site.
- What cleaning products, solvents, or graffiti-removal chemicals may be used.
- How touch-up repairs will be handled if the finish is damaged.
Do not assume a color chip represents long-term field appearance. Light, texture, nearby surfaces, and weather exposure can change how color is perceived. A sample panel or full-size mockup is often more useful than a small swatch.
Design Water Out, Not Just Water Resistance
Water should not remain trapped beneath furniture, inside hollow sections, or around mounting hardware. Require clear drainage paths and confirm that the site grading supports them.
Useful details can include:
- Slightly sloped horizontal surfaces where appropriate
- Drip edges on overhangs
- Venting or drainage provisions for enclosed voids
- Separation between composite shells and constantly wet surfaces
- Access to concealed drains or cavities when cleaning is necessary
- Gaskets, sealants, or isolation details where dissimilar materials meet
A frequent failure in public furniture planning is assigning drainage to the product while the site team assumes the slab or paver system will handle it. Show drainage responsibility and flow direction on the installation drawings.
Coordinate Bases, Anchors, and Site Interfaces
The furniture and the site foundation must be designed together. A well-made molded part can still crack, distort, loosen, or collect water if it is installed on an uneven base or attached through an unsuitable interface.
Before fabrication, confirm the following:
| Site interface | Questions to resolve before release |
|---|---|
| Concrete slab or footing | What are its dimensions, thickness, reinforcement, condition, and anchor zones? |
| Pavers | Is there a structural concrete base below, and can anchors bypass the paver layer? |
| Deck or roof surface | What structural support exists below, and how will waterproofing be protected? |
| Existing surface | Is scanning or field verification needed before drilling? |
| Embedded hardware | Who supplies it, who sets it, and what positional tolerance is acceptable? |
| Furniture base | Is it flat, shimmed, pedestal-mounted, or supported at defined bearing points? |
Anchor selection should account for the intended loads, the substrate, edge distance, corrosion environment, removal needs, and tamper resistance. The project engineer or responsible design professional should determine structural requirements where they apply; furniture suppliers should not be asked to make assumptions about unknown slab capacity or concealed site conditions.
Make Tolerances Visible
Coordinate dimensional tolerances early, especially for long modular runs, curved seating, multiple anchor points, and preinstalled embeds. A single rigid part with many fixed holes may be difficult to place if the concrete work varies from the assumed layout.
Where suitable, consider:
- Slotted mounting holes with defined adjustment direction
- Concealed mounting plates
- Separate leveling components
- Field-measured templates
- Modular joints that accommodate small site variation
- Adjustable hardware protected from public access
The drawings should identify finished grade, bearing surfaces, anchor locations, shim limits if allowed, sealant requirements, and whether installers may drill field holes. “Install level” is not enough instruction for a complex site interface.
Consider Edges, Ergonomics, and Accessibility
Public furniture should be comfortable, intuitive, and safe to approach from multiple directions. This is especially important for custom FRP forms because a sculptural profile can look compelling in a rendering while creating uncomfortable seating, snag points, trip edges, or difficult transfer conditions in real use.
Review physical interaction at full scale:
- Seat height, depth, back angle, and armrest placement
- Leading edges that contact the backs of legs
- Armrests or divisions that affect seating access
- Clearance around benches, tables, planters, and circulation paths
- Sharp corners, thin projections, and vulnerable overhangs
- Handholds needed for lifting removable components
- Heat retention on sun-exposed surfaces
- Whether a curved form creates awkward or unusable seating positions
Accessibility requirements vary by project type, jurisdiction, and site condition. Confirm applicable ADA requirements, state or local rules, owner standards, and landscape or architectural specifications with the responsible project team. Do not rely on a generic furniture description as proof of compliance.
For paths and plazas, coordinate furniture locations with clear walking routes, door swings, curb ramps, bicycle circulation, and maintenance access. A bench may be physically accessible yet still create a pinch point if placed without considering adjacent planters, light poles, or parked equipment.
Specify Color, Texture, and Graffiti Maintenance
Finish selection should balance visual goals with practical public use. Smooth, glossy surfaces may be easy to wipe but can show scratches, fingerprints, and reflected glare. Heavy textures can disguise wear but may hold dirt, complicate graffiti removal, or feel uncomfortable on seating surfaces.
Define the finish in terms the manufacturer, installer, and owner can all use:
- Color standard or approved sample
- Gloss range or visual intent
- Texture location and depth
- Molded versus post-applied finish
- Non-slip needs on surfaces intended for standing
- Permitted cleaning agents
- Graffiti-removal expectations
- Repair acceptance criteria
Plan for Graffiti Before It Happens
No finish eliminates vandalism risk. Instead, plan a response that avoids creating additional damage during cleanup. Ask the owner what products and methods their maintenance team normally uses, then confirm compatibility with the selected finish system.
An effective graffiti-maintenance plan identifies:
- The approved cleaning process.
- Products that should not be used without testing.
- Whether a protective coating is specified.
- The expected appearance after cleaning.
- Who authorizes repainting, refinishing, or panel replacement.
- How the owner will obtain color-matched repair material or replacement parts.
Avoid adding an unverified “anti-graffiti” requirement to an RFQ without defining the intended maintenance process. A coating can affect gloss, texture, color, adhesion, repairability, and cost.
Plan Inspection, Replacement, and Repair Access
Public furniture is easier to own when routine inspection and occasional repair were considered at the design stage. This does not mean every part must be easy to remove; it means the owner understands what can be inspected, tightened, cleaned, repaired, or replaced.
Create an asset-level maintenance outline that covers:
- Initial post-installation review
- Periodic checks for loose hardware, cracks, chips, movement, and drainage blockage
- Cleaning frequency and permitted methods
- Inspection of joints, sealant, and concealed mounting points
- Repair decision criteria
- Replacement procedures for modular or damaged sections
- Storage requirements for removable pieces, if applicable
Separate Cosmetic Damage From Structural Concerns
Surface scratches, discoloration, and small chips may be repairable, but the right response depends on the part design and damage location. Damage near anchors, thin edges, load-bearing sections, or embedded hardware deserves more careful review than a superficial mark on a nonstructural face.
For modular furniture, decide whether replacement should occur by:
- A removable exterior panel
- A complete seating module
- A standardized end section
- A concealed base or attachment component
- A site-applied repair system
If matching future replacement pieces is important, retain approved color samples, finish references, drawings, hardware schedules, and revision history. Do not assume a later production run will exactly match a weathered installed surface.
Use Prototypes or Mockups for Public-Space Review
Renderings and CAD models are valuable, but they rarely answer every question about scale, comfort, appearance, and installation. A prototype, finish board, partial corner mockup, or full-size sample can reduce uncertainty before production tooling is committed.
Use the review format that matches the risk:
| Review item | Best early-stage check |
|---|---|
| Color and surface texture | Finish sample panel in representative light |
| Seating comfort | Full-scale seating section or prototype |
| Anchor and base alignment | Installation template or base mockup |
| Modular joints | Multi-unit assembly sample |
| Drainage | Detail review plus physical water-flow check where practical |
| Site appearance | On-site mockup or temporary layout |
For a custom modular bench, a modular FRP park bench concept can help project teams identify the questions to resolve around geometry, support points, and joining before finalizing a unique design.
The public-space review should include the people who will approve appearance, install the product, maintain it, and use the surrounding site. Early feedback is especially important for furniture that crosses disciplines, such as a planter-seat combination or a form that interfaces with lighting, paving, railing, or irrigation.
Document Installation and Ownership Responsibilities
A successful installation package makes responsibilities explicit. Gaps between the landscape architect, general contractor, civil team, furniture supplier, installer, and owner can lead to site delays and disputes over drilling, drainage, finish damage, or missing hardware.
Before release for production, prepare a responsibility matrix covering:
- Final dimensions and approved drawings
- Material and finish approval
- Engineering responsibility for site foundations and anchors
- Surveying and layout control
- Foundation, slab, or embed installation
- Furniture delivery, handling, and staging
- Installation labor and equipment
- Hardware supply and corrosion compatibility
- Protection of finishes during construction
- Final cleaning and punch-list repair
- Owner acceptance and maintenance handoff
The installation documentation should include product weights or handling information when applicable, lifting points if provided, hardware schedules, anchor layouts, sequence of assembly, torque or fastening instructions where specified, protection requirements, and final inspection items. If any information depends on field conditions, label it clearly as requiring verification rather than presenting it as a fixed assumption.
Common Planning Mistakes to Avoid
The most avoidable problems usually originate before fabrication:
- Selecting a form before confirming the base and anchor strategy
- Ignoring drainage beneath hollow or low-clearance furniture
- Approving color from a small chip without evaluating texture and outdoor light
- Treating all outdoor FRP finishes as equally suitable
- Leaving ADA and local accessibility review until after layout approval
- Providing no allowance for construction tolerances
- Omitting access to concealed fasteners or service areas
- Assuming routine maintenance products are finish-compatible
- Failing to assign responsibility for finish damage after delivery
- Ordering modular units without a documented site assembly sequence
A practical RFQ should include drawings, quantities, site photographs, use conditions, finish intent, target dimensions, anchor and foundation information, relevant acceptance criteria, and the required prototype or sample review process.
GFIND can review buyer drawings and application requirements for manufacturability, tooling, prototypes, molded production, finishing, inspection to agreed references, and shipment preparation. When your project inputs are organized, you can contact GFIND to discuss a custom composite furniture RFQ.