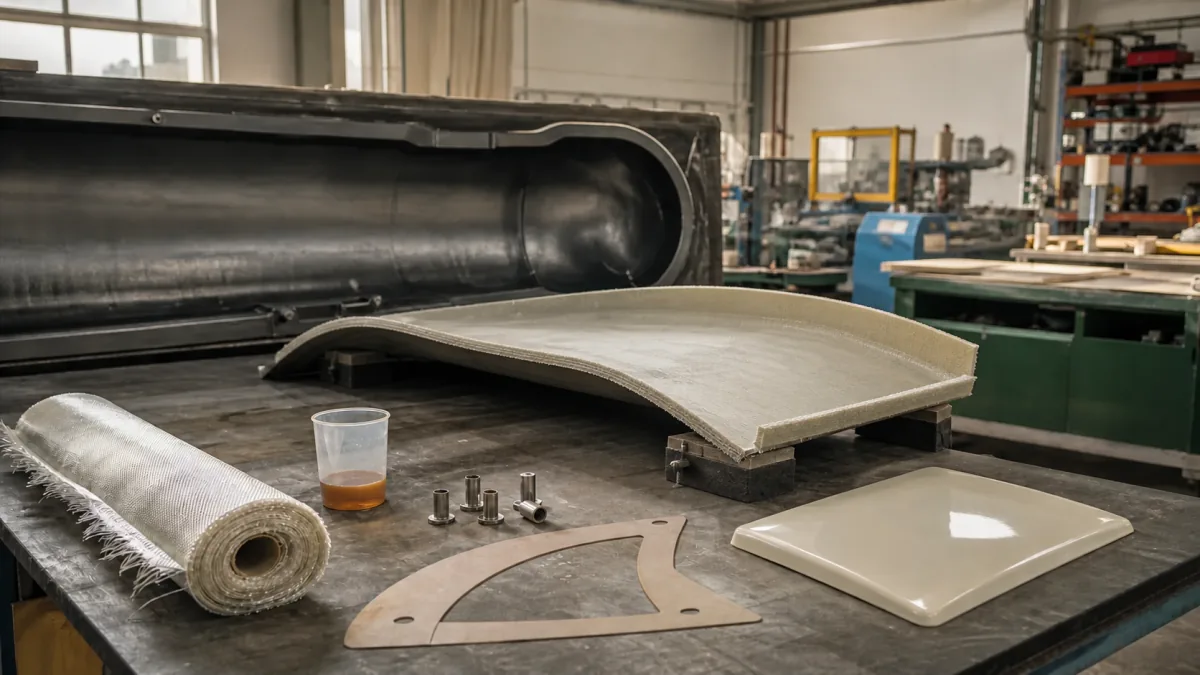
Shipping Large Molded FRP Parts: Packaging Guide
Learn how to package and ship large molded FRP parts with proper supports, crating, moisture control, documentation, and safe receiving procedures.
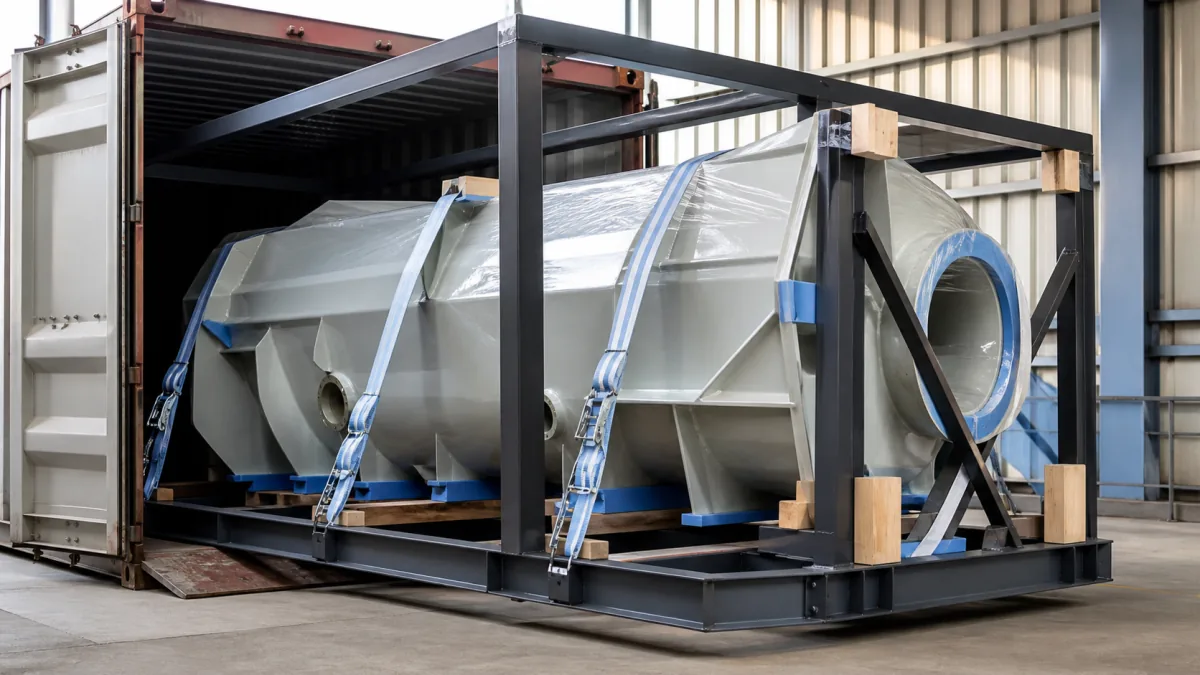
Shipping large molded FRP parts safely requires more than a strong crate. The packaging system must support the part at engineered locations, prevent flexing and abrasion, fit the transport route, and give the receiving crew clear instructions for lifting and unpacking.
For oversized fiberglass components, packaging should be defined alongside the part design—not after production is complete. A crate that is too small, poorly braced, difficult to lift, or incompatible with the destination site can turn an otherwise sound composite part into a damage claim or an installation delay.
Treat Packing as Part of Product Planning
Large FRP parts can be strong in their intended service direction while remaining vulnerable to point loading, unsupported spans, edge impacts, and twisting during transport. This is especially important for thin-walled shells, long panels, duct sections, architectural shapes, covers, housings, and parts with large openings.
Packing decisions affect the part itself. Before tooling, production, or shipment preparation, identify the conditions the packaging must address:
- Part overall length, width, height, and shipping weight
- Center of gravity, including any unevenly distributed reinforcements
- Stiff and flexible areas of the laminate
- Finished faces, gel-coated surfaces, paint, clear coats, and cosmetic zones
- Flanges, drilled holes, bonded inserts, threaded hardware, and protrusions
- Maximum permitted stacking load, if any
- Planned shipment mode: truck, ocean container, flat rack, breakbulk, or air freight
- Origin and destination lifting equipment
- Final delivery access, including dock height, gate clearance, and site roads
A part should not be treated as self-supporting just because it is rigid enough to handle in a factory. Road vibration, vessel movement, forklift contact, tie-down loads, and repeated lifting can create stresses that do not occur in normal service.
For custom programs, include packaging requirements in the drawing package, purchase order, or shipping specification. Useful requirements may state:
- Approved support zones and forbidden contact zones
- Orientation during storage and transport
- Maximum number of units per crate
- Whether stacking is prohibited
- Required crate lifting features
- Surface-protection materials and prohibited adhesives
- Photo-documentation requirements
- Labels, handling symbols, and shipment paperwork
This approach gives the manufacturer, freight forwarder, and receiving team one shared handling plan. Buyers sourcing custom composite solutions can also request a manufacturability and shipment-preparation discussion early, especially when part geometry or finish requirements make conventional pallet packing unsuitable.
Map Lift Points Supports and Fragile Areas
The first packaging drawing should show where the part can safely be supported and lifted. Do not assume a forklift can lift beneath any flat-looking area of an FRP component. A broad panel may still deflect under fork tines, while a flange may crack if used as a lifting ledge.
Identify engineered support locations
Support blocks, saddles, or frames should contact reinforced, structurally appropriate locations. The goal is to distribute load over a sufficiently broad area while keeping the part in a stable, repeatable position.
A support map should identify:
- Primary bearing points: Locations designed to carry the part’s static shipping load
- Stabilizing points: Secondary contacts that prevent rolling, lateral movement, or rotation
- No-contact areas: Cosmetic faces, unsupported skins, sealing surfaces, sharp radii, and delicate attachments
- Lift zones: Approved locations for forklift forks, slings, spreader bars, or crane hooks
- Tie-down zones: Areas that can tolerate restraint loads without crushing or distortion
For curved components, shaped timber saddles or fabricated steel frames lined with compatible cushioning may be more reliable than loose blocking. For long parts, supports should limit sag between bearing points. The appropriate spacing depends on laminate construction, part geometry, internal ribs, and allowable deflection, so it should be confirmed for the specific part rather than copied from another shipment.
Design lifting around the packaged assembly
The crate is only useful if it can be moved safely. Specify whether it will be handled by forklift, crane, container-loading equipment, or a combination of methods.
Common provisions include:
- Fork pockets sized and positioned for the expected forklift approach
- Clearly marked fork-entry sides
- Skid runners that keep fork tines away from the product
- Rated lifting lugs or lifting eyes on a reusable transport frame, where appropriate
- Crane lifting points positioned to keep the crate level
- Spreader-bar requirements where sling angles could crush or pull inward on the crate
Avoid lifting a large crate from an unmarked side. Fork tines can puncture a crate base or strike the part, particularly when clearance is limited. If the center of gravity is offset, mark it visibly and state any special lifting direction.
Account for attachments and removable components
Handles, brackets, loose hardware, transparent covers, trim pieces, and mating hardware often create avoidable shipping risks. Determine whether these items should be:
- Installed and protected in place;
- Removed and packed in labeled internal compartments; or
- Shipped separately in a smaller box linked to the main crate number.
Small loose parts should never be allowed to move freely inside a large FRP assembly. Their motion can scratch finished surfaces or create impact damage that is hard to diagnose after delivery.
Protect Flanges Edges and Finished Surfaces
The outer surface of an FRP part may be functional, cosmetic, or both. Gel coat, paint, polished molds, textured finishes, and prepared bonding surfaces each need different protection. A packaging material that appears soft can still abrade a surface after days of vibration.
Use layered protection, not a single wrap
A practical protection system often has several layers:
- Clean separation layer: Prevents direct contact between the finish and packing materials.
- Cushioning layer: Absorbs vibration and minor impact without concentrating pressure.
- Rigid guard or blocking: Shields vulnerable edges, corners, flanges, or protrusions.
- Crate restraint: Keeps the part and its protective layers from shifting.
Select materials based on surface compatibility, temperature exposure, shipment duration, and moisture conditions. Avoid allowing unprotected timber, metal strapping, staples, or abrasive corrugated material to contact a finished FRP surface.
Protective films and tapes need special care. Some adhesives can leave residue, print through, or become difficult to remove after heat exposure or long storage. Confirm adhesive compatibility with the actual gel coat, paint system, or finish before specifying a film for extended transit.
Give flanges and edges dedicated protection
Flanges are often the most vulnerable features on molded FRP parts because they project from the main body and may include bolt holes, seal faces, or machined surfaces. Do not rely on stretch wrap alone to protect them.
Consider:
- Rigid edge caps or custom guards
- Foam-lined flange protectors
- Separate blocking that prevents contact with crate walls
- Internal braces that stop the part from rocking
- Covers for machined faces, threads, inserts, and sealing surfaces
For parts with drilled mounting holes, prevent crate fasteners from entering or misaligning with those holes unless the fixture was specifically designed for that use. Bolting through a part can be effective for some designs, but only if the load path, washers, hole tolerance, and finish protection are deliberately defined.
Avoid over-tightening restraints
Straps and blocking should prevent movement without crushing the laminate. Excessive strap tension can create localized compression marks, distortion, or cracking near thin sections. Wide restraints, padded contact zones, and positive mechanical bracing are generally preferable to narrow straps pulled tightly across a finished surface.
Match Crates and Frames to Part Geometry
The right shipping enclosure depends on geometry, transport method, weather exposure, security needs, and handling sequence. A fully enclosed wood crate is not automatically the best option; a reusable frame, open crate, skid, or custom rack may better protect certain parts.
| Packaging approach | Best suited to | Main advantage | Key limitation |
|---|---|---|---|
| Skid with protective cover | Stable, compact parts with low side-impact risk | Lower material use and easy forklift access | Limited weather and side-impact protection |
| Open crate | Large parts needing visible inspection and accessible lift points | Good structural restraint and handling visibility | Requires careful weather protection |
| Fully enclosed crate | Cosmetic or complex parts requiring strong external protection | Shields parts from contact, debris, and casual handling | Can hide damage and add size or weight |
| Custom transport frame | Repeat shipments or parts with complex curved geometry | Repeatable support at controlled load points | Requires up-front design and storage planning |
| Container-specific rack | High-volume or repeat ocean shipments | Uses container space efficiently | Must fit the exact container and load plan |
Crate geometry should provide clearance around the protected part. If the part is packed tightly against sidewalls, small crate deflections may transfer directly into the product. At the same time, excessive empty space encourages movement and can waste freight volume.
A useful crate design answers these questions:
- Can the part shift in any direction?
- Does the crate maintain clearance at all fragile features?
- Are support blocks fastened so they cannot migrate?
- Can the crate tolerate normal lifting without racking?
- Can the receiver access fasteners without damaging the part?
- Does opening the crate release a restrained component unexpectedly?
- Does the package allow inspection before complete unpacking?
Large decorative panels and cladding elements deserve particular attention because face quality can be as important as structural performance. Buyers evaluating architectural facade panels should define visible-face orientation, acceptable surface-contact areas, and required protection before shipment.
Check Container Route and Site Constraints
A crate that fits the part may not fit the supply chain. Check the entire route before finalizing the package dimensions, not just the available floor area in a shipping facility.
For overseas shipments, determine whether the packaged part will move in a standard container, high-cube container, open-top container, flat rack, or another freight arrangement. Exterior dimensions alone are not enough. Door openings, internal clearance, loading sequence, securing points, and cargo weight distribution all matter.
Confirm route limits early
Review the following with the freight provider and destination team:
- Crated length, width, height, and gross weight
- Container internal dimensions and door opening dimensions
- Need for side loading, top loading, or crane handling
- Container payload and cargo distribution limits
- Lashing requirements and available securing points
- Port, terminal, and inland transport restrictions
- Maximum bridge, road, gate, dock, or building clearances
- Whether a forklift can safely unload at the destination
- Any need for a crane, telehandler, or rigging crew at delivery
The last mile is frequently overlooked. A component may arrive at a port or warehouse in a suitable container but still be impossible to unload at a jobsite without equipment that was not planned or budgeted.
Do not design only for the outbound load
Consider return and disposal requirements as well. A reusable frame may make sense where the buyer can return it or use it for on-site staging. In contrast, a heavy crate may create disposal burdens at a constrained construction site. If the receiver must break down the crate, specify accessible fasteners and avoid designs that require unsafe cutting near the part.
Control Moisture Movement and Contact Materials
Overseas transport can expose packaged FRP parts to humidity, condensation, temperature changes, and extended storage. FRP itself is generally selected for corrosion resistance in many applications, but the complete shipment can still be affected by trapped moisture, wet timber, metal hardware corrosion, mold growth on packing materials, and staining on finished surfaces.
Moisture-control planning should include:
- Dry packaging materials at the time of packing
- A moisture barrier or sealed inner wrap where appropriate
- Desiccant quantity and placement based on package volume and trip conditions
- Separation between the part and moisture-retaining materials
- Ventilation strategy for packages that should not be sealed
- Corrosion protection for metal inserts, fasteners, and accessories
- Inspection of packaging after weather exposure before loading
Do not place desiccant directly against finished surfaces. Secure it in pouches or designated holders so it cannot shift during transit. Also avoid sealing moisture into the crate: wrapping a part while it, its cushions, or its timber supports are wet can create an unfavorable internal environment.
Contact-material compatibility matters beyond moisture. Some foams, plastic films, tapes, inks, and rubber compounds may discolor or mark certain finishes. The safest practice is to approve materials against representative finished surfaces, especially for high-visibility products.
Define Packing Photos Marks and Documents
Clear shipment records help the buyer verify condition, guide handling, and resolve discrepancies without relying on memory. Documentation should be created before the crate is closed and again after the final package is complete.
Capture useful packing photos
A practical photo record may include:
- The part before packing, showing overall condition
- Close-ups of finished faces, edges, flanges, and vulnerable features
- Support blocks, braces, and restraints before enclosure
- Internal accessory boxes and their labels
- Moisture-control materials, where used
- Closed crate from all sides
- Crate labels, orientation arrows, lifting points, and crate number
- Final loaded position in the container or on the transport equipment, when available
Photos should be dated and associated with the part number, serial number if applicable, crate number, and shipment reference. They are most useful when the same identifier appears on the packing list and exterior marking.
Mark the crate for real-world handling
Exterior markings should be large, durable, and placed where handlers can see them without moving the package. Depending on the shipment, include:
- Consignee and delivery reference
- Purchase order, part number, and crate number
- Gross weight and package dimensions
- Center-of-gravity marking, when relevant
- Fork-entry and lifting-point markings
- Upright orientation arrows
- “Do Not Stack” notice when applicable
- “Open This Side” or unpacking sequence instructions
- Weather-protection or storage instructions
Documents should match the actual shipment configuration. At minimum, buyers commonly need a packing list that identifies each crate and its contents. International shipments may also require commercial and customs documents appropriate to the transaction; confirm the needed paperwork with the responsible exporter, importer, and freight provider.
Plan Receiving Inspection and Safe Unpacking
Receiving inspection should begin before the crate is unloaded or opened. The goal is to document visible shipping condition, preserve evidence if damage is suspected, and avoid creating new damage during unpacking.
Receiving checklist
Before signing final receipt where practical:
- Compare crate count, identification, and visible condition with the shipping documents.
- Photograph all crate sides, including punctures, crushed corners, water staining, broken bands, or shifted blocking.
- Note exceptions on the delivery receipt according to the carrier’s process.
- Move the crate only using the marked lift points and orientation.
- Open the crate in a clean, level area with sufficient clearance.
- Follow the marked opening sequence and do not cut deeply near the part.
- Inspect the part before removing protective materials from high-risk areas.
- Compare the part number, quantity, accessories, and visible condition with the packing list.
- Retain packaging and photographs if a transport issue may need review.
Do not assume that an intact outer crate proves the part is undamaged. Conversely, exterior crate damage does not always mean the component is damaged. The internal support arrangement and inspection record provide the information needed to make that determination.
Unpacking should be treated as a lifting operation, not simply a warehouse task. Confirm the receiver has suitable equipment, trained personnel, approved lift points, and adequate rigging before restraints are removed. If the part is top-heavy, curved, or held in a custom transport frame, release one restraint at a time while maintaining controlled support.
For a custom FRP or carbon-fiber part, include the packing and handling requirements in the RFQ alongside drawings, finish expectations, shipment route, and receiving conditions. GFIND can review buyer drawings and application requirements as part of planning for custom composite components. For project-specific discussion, use the contact page and provide the anticipated package dimensions, shipment method, destination handling equipment, and any required documentation.