Medical Equipment Housing Service Access Design Guide
Plan medical equipment housing service access with practical guidance on panels, fasteners, cable clearance, cleanability, and prototype checks.
Medical equipment housing service access should be designed around the work technicians must perform, not added after the internal layout is complete. A housing that looks clean but requires excessive disassembly to replace a filter, inspect a cable, or service a pump can increase downtime, damage cosmetic parts, and introduce reassembly errors.
For custom composite housings, including fiberglass-reinforced plastic (FRP) covers, the best approach is to define service tasks, module boundaries, removal paths, attachment methods, and cleaning requirements together. The result should give authorized personnel appropriate access while protecting users from energized, hot, moving, or otherwise restricted components.
Map Users, Service Tasks, and Internal Modules
Start with a service-access map before deciding where cosmetic seams or panel edges belong. Identify who will open each part of the enclosure and what they need to do after opening it.
Typical users may include:
- Operators performing routine cleaning or changing approved consumables
- Field service technicians replacing modular assemblies
- Depot repair teams diagnosing faults or replacing internal components
- Manufacturing personnel completing final assembly and inspection
- Clinical engineering teams performing preventive maintenance
For every task, document the required frequency, tools, access duration, and components affected. A door needed weekly for a filter change deserves a different design than a rear cover removed only during factory repair.
A practical access map should identify:
- The serviceable item: Filter, power supply, display assembly, pump, cable harness, fan, sensor, battery, or other module.
- The task: Inspect, clean, adjust, disconnect, replace, or calibrate.
- The access side: Front, rear, side, top, bottom, or an internal compartment.
- The allowed user: Operator, trained technician, or factory-only personnel.
- The removal sequence: What must be opened, disconnected, or moved first.
- The reassembly check: Fastener torque, latch engagement, cable routing, gasket placement, or functional confirmation.
This map prevents a common mistake: treating all internal components as equally accessible. Access should be intentional. Frequently serviced modules may need independent panels, while parts that should not be reached during normal maintenance may belong behind a separate secured cover.
When reviewing early CAD, ask whether a technician can see the part, reach the connector, manipulate the required tool, and remove the component without forcing nearby wiring or damaging the housing finish.
Choose Panel Splits and Removal Directions
Panel splits determine whether service access is straightforward or frustrating. They also affect enclosure stiffness, seam appearance, molding complexity, assembly time, and the risk of interference with nearby components.
Place panel boundaries around logical module zones whenever possible. For example, a rear electronics compartment, a side filter bay, or a front user-interface assembly may each justify a dedicated access strategy. Avoid placing a seam through an area where a technician must slide out a long internal module.
Match the opening style to the task
| Access approach | Best suited for | Key advantages | Main design checks |
|---|---|---|---|
| Fully removable panel | Infrequent repair and broad internal access | Clear opening; simple panel geometry | Safe panel handling, retained fasteners, storage during service |
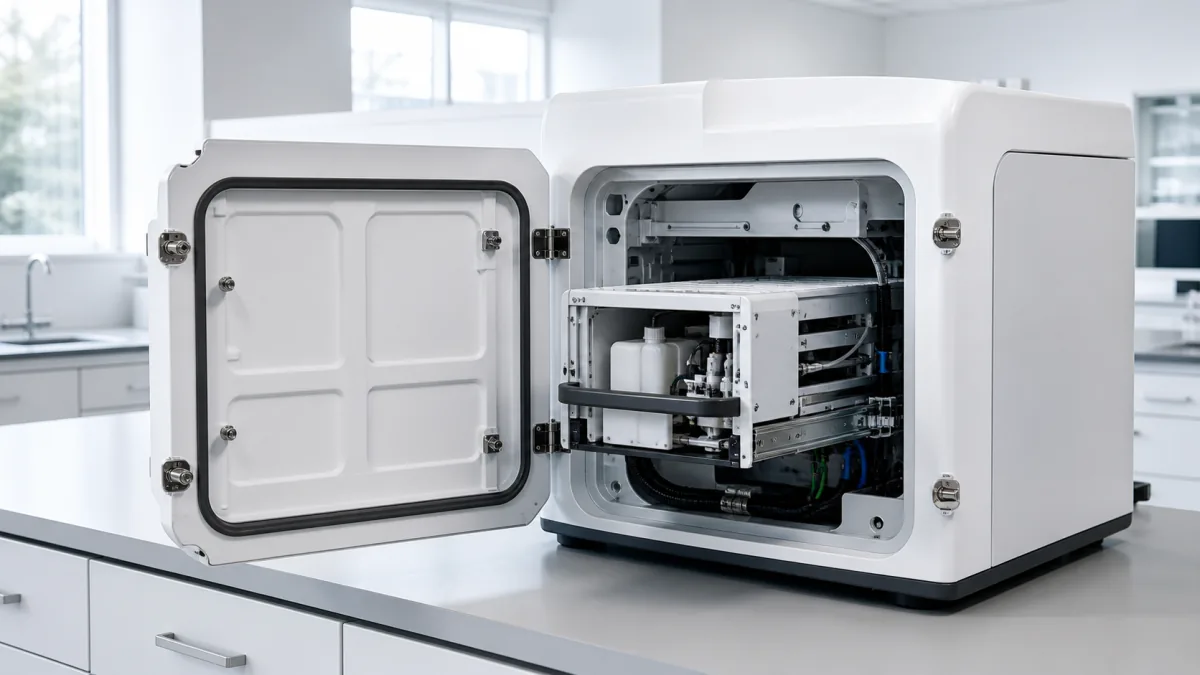
| Hinged door | Routine inspection or consumable replacement | Panel stays with the device; quick access | Hinge load, opening angle, pinch zones, cable clearance |
| Small service hatch | Limited adjustments or filter access | Preserves large cosmetic surfaces | Tool reach, visibility, latch durability, gasket path |
| Slide-off cover | Controlled removal in a clear direction | Can create a clean exterior with few visible fasteners | Release path, rail engagement, tolerance stack-up |
| Modular front or rear shell | Assembly and replacement of a major subsystem | Supports module-level service strategy | Connector sequence, lifting points, alignment features |
Define the removal direction in the CAD model with the same care used for the panel shape. A panel may be easy to unfasten but impossible to remove if it collides with handles, connectors, wall clearances, or another housing section.
For each removable part, verify:
- Minimum clearance required to lift, slide, or swing the panel away
- Whether the device can remain in its expected installed position during service
- Panel weight and grip location
- Interference with cables, tubing, connectors, or internal brackets
- Whether loose fasteners or small trim pieces can fall into the device
- Whether a removed panel exposes sharp edges or restricted areas
Avoid relying on “flexing the cover” as an intended removal method. FRP panels can be engineered for stiffness and durability, but repeated forced deflection around fasteners, corners, or cutouts can affect appearance and long-term fit. If a panel needs flex to clear an obstruction, revise the split line, mounting geometry, or service sequence.
For enclosure concepts and material considerations, see custom medical equipment housing solutions.
Protect Cables, Hoses, Airflow, and Moving Parts
An open service panel changes the working environment inside a device. Once a technician reaches in, cable bundles can be pulled, hoses can kink, airflow paths can be blocked, and moving parts can become exposed. Service access must preserve the designed routing and separation of these elements.
Use fixed routing features rather than expecting technicians to recreate an informal cable path. Depending on the component and operating environment, this can include clips, tie-down points, channels, strain-relief features, pass-through grommets, guides, and labeled connector locations.
Build clearance into the service path
Check the full removal path of every serviceable component, not only its installed position. A power module may clear its mounting screws but catch a wire harness during extraction. A hinged panel may open correctly until a hose reaches its bend limit. A filter can be accessible through a hatch yet be difficult to remove without shedding debris into nearby electronics.
Review these issues early:
- Cable bend radius: Leave enough space for harnesses and flexible cables to move without sharp turns or compression.
- Strain relief: Ensure panel-mounted connectors and cables are supported so panel removal does not transfer load to terminations.
- Hose routing: Prevent pinching, abrasion, excessive bend, and unintended disconnection.
- Airflow separation: Do not place service panels or added sound insulation where they obstruct intake, exhaust, fans, ducting, or filter changes.
- Moving mechanisms: Keep service openings, finger access, and removable covers clear of actuators, fans, belts, and other moving parts.
- Foreign-object control: Design so dropped screws, tools, or debris are less likely to enter fans, electrical areas, or fluid paths.
A useful practice is to model service tools and human hand clearance. A connector may technically be reachable but still be impractical to release if its latch faces a wall or if there is no room to rotate a screwdriver.
Select Fasteners, Hinges, Inserts, and Latches
The attachment method should match access frequency, required retention, expected loads, and the intended service user. Selecting hardware only for its exterior appearance can create stripped threads, loose panels, rattles, misalignment, or panels that are difficult to reinstall.
For FRP housing components, threaded hardware generally requires planned support features. Repeatedly driving screws directly into an unreinforced composite panel may not provide the durability needed for recurring service. Designs often use appropriate inserts, backing structures, brackets, or hardware-specific mounting details, depending on the panel construction and loading.
Choose hardware by service level
- Captive screws: Useful when a panel must remain securely retained and lost hardware is a concern. Confirm tool type, access angle, quantity, and installation sequence.
- Threaded inserts: Appropriate where repeated removal requires a durable threaded interface. Confirm insert type, pull-out and torque needs, local wall thickness, and backing geometry.
- Quarter-turn fasteners: Can speed access for trained personnel. Verify vibration resistance, retention, panel compression, and whether the fastener is acceptable for the intended user.
- Compression latches: Helpful for larger doors or gasketed panels. Confirm closing force, latch engagement, alignment tolerance, and emergency release needs.
- Hinges: Reduce the chance of a loose panel being misplaced. Check opening angle, cycle requirements, hinge attachment loads, and whether the open door blocks service space.
- Hidden fasteners: Improve exterior appearance but should not create an unclear or overly complex removal sequence.
Keep fastener types consistent where possible. A technician should not need several driver types to remove one routine service panel unless there is a deliberate reason to differentiate restricted access.
Also consider alignment features separate from fasteners. Locating tabs, pins, flanges, and ledges can help panels seat correctly before screws or latches are engaged. This reduces the chance that a technician uses fasteners to pull a misaligned panel into place, which can stress cosmetic surfaces and distort gaps.
Plan Cleaning Surfaces, Gaps, and Edge Details
Service access affects cleanability as much as it affects maintenance. Every panel seam, recessed screw, latch pocket, and gasket channel can collect dust, fluid residue, or cleaning-agent residue. The correct solution depends on where and how the device will be used, as well as the cleaning methods defined by the OEM.
Make service seams deliberate rather than incidental. A narrow, inconsistent gap can be difficult to clean and visually distracting. An overly deep seam may create a debris trap. Define expected panel gaps, edge overlap, and transition geometry in the design references used for tooling and inspection.
Consider the following:
- Favor smooth, drainable or wipeable exterior transitions where practical.
- Avoid sharp exposed edges at service openings and cutouts.
- Recess hardware only when the recess can be cleaned appropriately.
- Ensure gaskets, seals, and compression features can be inspected and replaced if they are serviceable.
- Avoid seams directly below areas where liquid could pool or migrate into the enclosure.
- Specify the cleaning agents and procedures that housing materials, finishes, labels, adhesives, and seals must tolerate.
A visually seamless exterior is not automatically the most maintainable design. In some cases, a visible but controlled panel break is easier to open, inspect, clean, and reinstall than a concealed seam with limited tool access.
Where cosmetic requirements are especially demanding, review mold parting lines, fastening locations, edge returns, and finishing expectations during the manufacturability stage. These choices are central to custom FRP housing design, not finishing details to resolve after tooling begins.
Separate Cosmetic Covers from Safety Functions
A cosmetic cover should not be assumed to provide a safety barrier simply because it encloses a device. The OEM must clearly define which parts are decorative, which retain internal components, which control access, and which contribute to the device’s required safety functions.
This distinction matters when a service panel is removed. If a cover also supports a cable, maintains a required spacing, holds a fan guard, protects a hot surface, or provides a barrier to a restricted area, its design and attachment need more rigorous engineering attention than a purely decorative trim piece.
Separate these functions in the product architecture where practical:
- Use structural brackets or internal frames for load-bearing support.
- Use dedicated guards or barriers for restricted hazards.
- Use cosmetic covers to provide the intended exterior form and controlled access.
- Use hardware and locating features that make incorrect reassembly less likely.
- Clearly identify covers that should only be removed by trained personnel.
A common risk is allowing a cosmetic panel to become the only retention method for internal equipment. That can make panel removal unsafe or force technicians to support a heavy module while releasing the final fastener. Instead, provide independent mounting and consider temporary service support, retention straps, or staged release features where appropriate.
If a housing is being developed for a specialized device enclosure, the design approach may differ by internal architecture. For an example of a focused application category, review FRP medical laser housing design considerations.
Prototype Assembly and Maintenance Access
A prototype is the most effective way to expose service-access problems that CAD reviews can miss. Digital interference checks are valuable, but they do not fully reproduce tool handling, panel flex, visibility, grip, cable movement, tactile feedback, or the effects of normal assembly variation.
Prototype the service sequence, not just the exterior form. Use representative internal modules, wiring, hoses, fasteners, and service tools whenever feasible. Have a person unfamiliar with the design follow the written procedure. Their questions often reveal missing labels, unclear fastener locations, poor access angles, and steps that depend on tribal knowledge.
What to review during a service-access trial
- Remove each panel using the intended tools and sequence.
- Confirm the technician can hold or safely set aside the removed part.
- Access and remove each designated module without disturbing unrelated components.
- Check cables, hoses, airflow components, and connectors through the full service motion.
- Reinstall covers and verify that alignment features engage without excessive force.
- Inspect exterior gap consistency and cosmetic surfaces after repeated removal.
- Confirm that labels, safety markings, and service instructions remain visible where needed.
- Record any added force, hidden step, loose hardware, or ambiguous reassembly condition.
Do not limit evaluation to a brand-new prototype. Repeated opening and closing can identify wear at hinges, inserts, latches, panel edges, and gasket contact areas. It can also show whether technicians tend to pull on the wrong location or use a panel as a handle.
When requesting molded production parts, provide the service scenario alongside the drawing package. GFIND can support custom fiberglass and carbon-fiber components from buyer drawings and application requirements, including manufacturability review, tooling, prototypes, production, finishing, agreed-reference inspection, and shipment preparation. The OEM should still specify the intended access cycles, hardware, cosmetic criteria, and acceptance references.
Keep Device Validation with the OEM
A housing supplier can manufacture to defined drawings and agreed requirements, but the OEM remains responsible for device-level design decisions, verification, validation, risk management, and applicable regulatory obligations. Service access is part of the complete device system because opening a panel may affect electrical protection, thermal behavior, fluid containment, electromagnetic performance, user access, and labeling.
Keep the following items under OEM control:
- The intended-use definition and permitted service users
- Device-level hazard analysis and access-control requirements
- Requirements for enclosure protection, electrical safety, thermal performance, and other applicable functions
- Final materials, finish, labeling, and cleaning compatibility criteria
- Service procedures, training requirements, and replacement-part controls
- Verification and validation plans for the assembled device
The housing manufacturer needs clear inputs, but should not be expected to infer device-level requirements from exterior geometry alone. A good RFQ separates the part requirements from the device verification responsibilities.
Useful RFQ inputs include CAD files, drawings, critical dimensions, panel-gap expectations, surface finish references, hardware specifications, insert locations, service sequence drawings, environmental considerations, cleaning agents, packaging requirements, and the inspection references that will be used for acceptance.
For additional sourcing guidance, read how to choose a manufacturer for custom medical equipment housings.
A practical next step is to create a one-page service-access matrix for every removable panel and serviceable module, then review it against the housing CAD before releasing tooling.